")
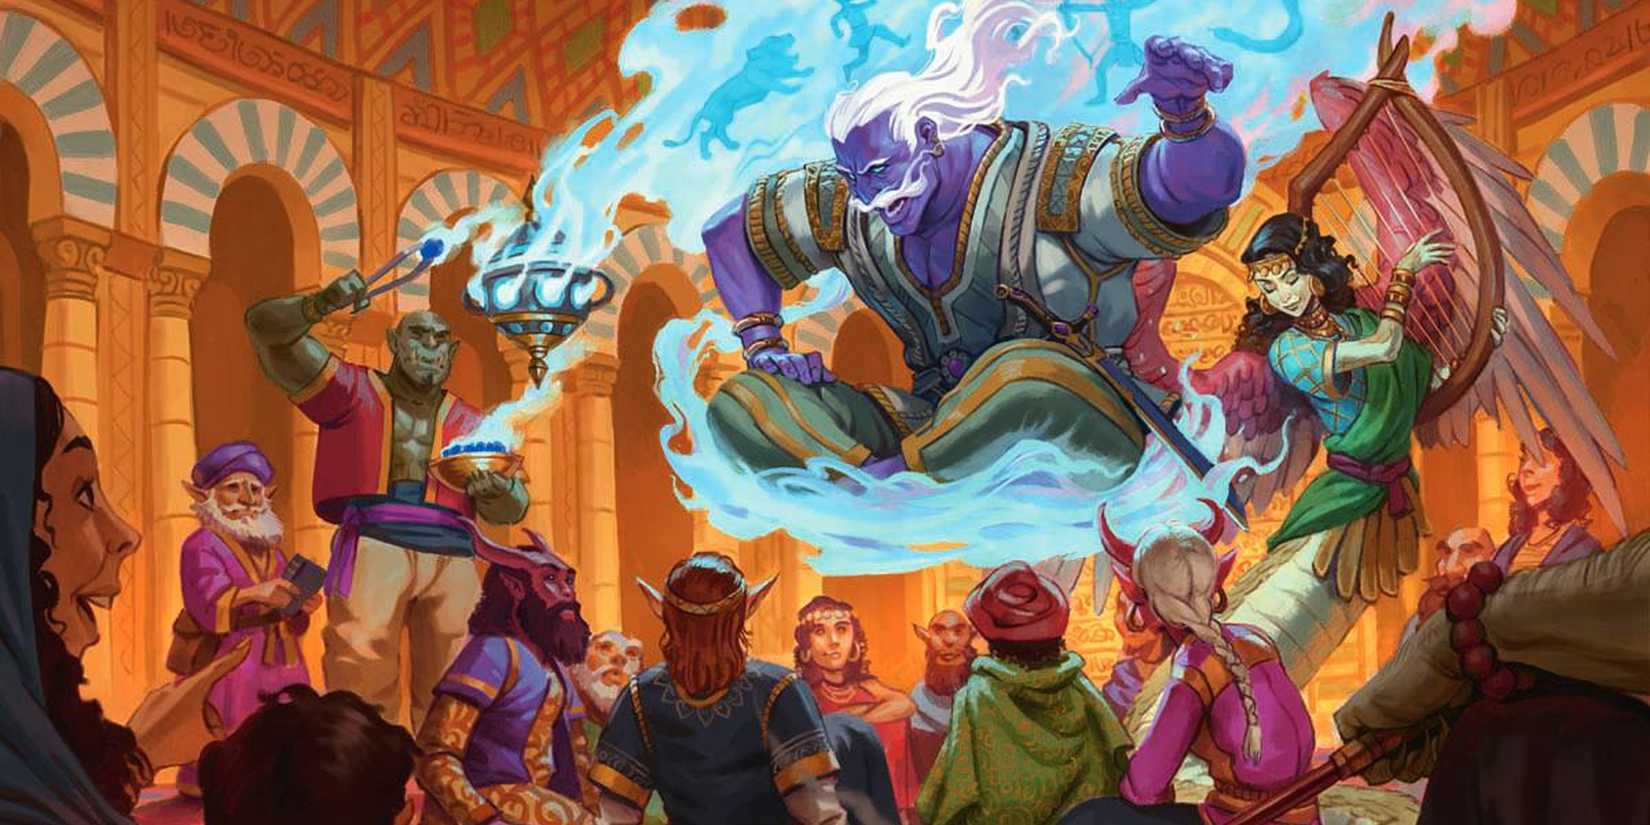
The new Dungeons & Dragonsbook Forgotten Realms: Adventures in Faerûn packs a lot in between its covers, especially when it comes to the titular adventures. While a typical D&D anthology might feature something in the vicinity of ten modules, Adventures in Faerûn scales them down and packs them in. In total, the book houses 50 bite-sized adventures, enough to easily sustain months or years of campaigning in the Forgotten Realms.
The bare-bones nature of these adventures leaves a lot to the DM’s discretion, so how fun they are in practice will vary wildly from table to table. All the same, some are more inherently intriguing than others, and there’s also one longer module in addition to the miniature ones. Among the full array of Adventures in Faerûn‘s adventures, ten stand out as ones that every table has a strong chance to enjoy.
The Curse On Humble Hill
Level 1 Chauntea Adventure
A good first-level adventure should never be underestimated, and “The Curse on Humble Hill” fits the bill. This quest to track down a suspicious alchemist isn’t as wildly creative as some others in the book, but it has all the essentials for a perfect way to ease into some new characters.
Rather than fighting bog-standard spiders or rats, “The Curse on Humble Hill” has some fun encounters, like a myconid spore servant and a psychic gray ooze. It also features a solid dungeon map, making the adventure one of the easier ones to run with minimal prep.
The Shadow Parliament
Level 9 Baldur’s Gate Adventure

Most ofthe mini-modules in Forgotten Realms: Adventures in Faerûn focus on combat or puzzles, but a limited selection could be perfect for parties that prefer roleplaying. Among these options, “The Shadow Parliament” stands out as the most unique option. Although there’s still some combat to enjoy, the central thrust of the module centers on the party successfully navigating a high-stakes debate.
“The Shadow Parliament” isn’t the right choice for DMs that don’t like to flesh out their NPCs, but bringing each debate participant to robust life can make for a memorable night. Even if the module itself doesn’t quite fit a campaign, its basic structure and concept could provide a fun idea to loosely incorporate into larger plots or adventures.
The Tenebrous Stone
Level 3 Ilmater Adventure

Stone map textures are a dime a dozen in D&D, but a quarry map is a fairly interesting twist. This adventure makes use of a complex environment with square outcroppings of various heights. While the text doesn’t provide much in the way of details, using some creativity in the distribution of enemies and combat opportunities could turn “The Tenebrous Stone” into a fantastic session.
The titular stone is the cherry on top, playing out a vision of a past failure for each character. Whether you’re delving into character backstories or reliving the rough points of the campaign so far, this can be a great opportunity for party members to confront their shortcomings.
Retaking The Terror
Level 4 Icewind Dale Adventure

Icewind Dale adventures are great for a winter night, and “Retaking the Terror” might be the most exciting new addition to the setting. With a memorable NPC called Vargazt the Wretch and a striking setting of chardalyn dragon remains, this one brings enough excitement to heat up even the frzeon reaches.
If the party is looking for an interesting Bastion to occupy, Retaking the Terror is hard to beat. After completing the adventure, the party can convert the dragon’s remains into a bastion. Whether you’re setting up a custom Icewind Dale campaign or looking for material to fill in some of Icewind Dale: Rime of the Frostmaiden‘s gaps, “Retaking the Terror” is definitely worth a look.
The Lost Library of Lethchauntos
Level 1 Adventure For Any Faerûn Setting

It’s difficult to judge “The Lost Library of Lethchauntos” against other adventures in the book, as this particular module takes up the entirety of Chapter Seven. If you’re looking for a more substantial adventure, “The Lost Library of Lethchauntos” is the only choice, but it’s a solid experience either way.
The central subject of this module is a legendary book of poisons and spells, which the party is racing to find before the Zhentarim can. In the course of two or three sessions, they’ll journey to the library, plumb its depths, and deal with plenty of threats before recovering the book they seek.
The Calimemnon Conspiracy
Level 8 Calimshan Adventure
“The Calimemnon Conspiracy” is another adventure that’s heavy on roleplaying, throwing the party into the mix at a festival in Calimport. Here, they’ll deal with four different genie factions, each with its own ambassador that can be wooed according to their own tastes.
The real star of the show isn’t the roleplaying, however, but the artifact involved in the adventure’s climax. Everything leads up to a “falling star” that turns out to be the Calimemnon Crystal, one of the most powerful magic items in Forgotten Realms: Adventures in Faerûn. With fascinating ties to the lore of Calimshan and some fun opportunities for the party to play diplomat, “The Calimemnon Conspiracy” is a great way to explore one of D&D‘s coolest settings.
The Ashen Faithful
Level 10 Bane Adventure

Few things make D&D more intense than a ticking clock, and “The Ashen Faithful” has a particularly high-stakes countdown. After Banites seize control of a gladiatorial arena and kill those they oppose, the party ends up tasked with the rescue of a senator set for execution.
Despite the urgency of the situation, the party does have a few hours to prepare, offering the perfect set-up for careful planning to go incredibly awry. Rescuing the senator makes use of the arena map full of hazards, providing similar excitement to a typical gladiatorial scenario without sticking to the formula. Everything ends in a city chase, as an Ice Devil will pursue the escaping party.
In For A Penny
Level 7 Forgotten Realms Adventure

Although it’s just as short as the rest of Adventures in Faerûn‘s adventures, “In for a Penny” crams three interesting stages into its plot. Things start with a riot, as the citizens of Telflamm have just fallen victim to a financial scheme. The party can navigate this scenario with diplomacy, investigative work, or brute force, but it should eventually lead them into the sewers.
After navigating the sewers, the party will reach the vault, where the figure behind the scheme is attempting to escape with her loot. Cue a mine cart chase, complete with a table of interesting complications. The adventure is full of fun possibilities throughout, but the mine cart chase is what gives it the edge over most competitors.
Blood Night
Level 4 Baldur’s Gate Adventure

Although the Upper City of Baldur’s Gate might be more civilized than the wilds of the Forgotten Realms, it isn’t any less dangerous. “Blood Night” is the perfect example of an interesting urban threat, locking the party in a house where the hosts plan to murder every guest.
Surviving the party gone wrong will take some wits, but the party will be well-rewarded for doing so. If all four hosts die, the party can receive the deed to the manor from its former owner, giving them a Baldur’s Gate bastion to use in the future.
Dread March Of The Bone Titan
Level 13 Kelemvor Adventure

If you’ve ever wanted Dungeons & Dragons to feel more like Shadow of the Colossus, look no further than “Dread March of the Bone Titan.” Rather than sending the party into a hidden temple or network of caves, this adventure places its dungeon inside a “massive, walking necropolis called the Bone Titan.”
“Dread March of the Bone Titan” sets the mood well, leading up to the dungeon with ruined lands left in its wake. Once the party figures out a way inside, they’ll have to take care of threats inside and bring the titan itself to a halt. In the aftermath of this Dungeons & Dragons adventure, the titan will slowly become a part of the natural landscape, making for an atmospheric conclusion that’s just as strong as the start.
- Original Release Date
-
1974
- Publisher
-
TSR Inc., Wizards of the Coast
- Designer
-
E. Gary Gygax, Dave Arneson
- Player Count
-
2-7 Players


